Sunday, August 8, 2021

Low Carb Crustless Pizza Casserole


When I make pizza for Beckett, I normally eat the toppings off of 1 or 2 slices to keep away from the carbs, but I always feel bad throwing out the bread out.  For lunch today I made pizza for him, but in a small, separate glass pie plate I layered some toppings to make a low carb, keto friendly casserole.  

Depending on the size of the casserole dish, you can use whatever amounts of toppings desired.  
I made Beckett's pizza then what I had left I layered in my dish. 

What I used: 
Rao's pizza sauce (I used one small jar but if you're doing a larger casserole you'll need 2)  
I tube of Jimmy Dean Sausage  
Pepperoni 
Sliced Black Olives 
Baby Bella Mushrooms 
Shredded Mozzarella Cheese 
1 Tbsp. Oregano 
1 Tsp. Garlic Powder 

~Brown sausage in a pan, rinse, drain and set aside. 
~Saute mushrooms along with oregano and garlic powder and set aside.  

Mix together sausage and pizza sauce and layer the bottom of a casserole dish.  Sprinkle a layer of mozzarella, then a layer of mushrooms, repeat another layer of cheese, then top off with black olives and pepperoni.  

Bake at 400 for about 10-15 minutes or until cheese is melted and starts to brown.  

This dish can easily be changed up so many ways.  There are so many options.  Next time I may use fresh mozzarella slices or add in some sauteed onion and chopped bell pepper.  

The sky is the limit with this easy low carb option.  Make it your own!

Tuesday, July 27, 2021

Porch Updates

Wow.  This is the first post I've done in a while that wasn't about low carb food!  I've been itching to make some improvements around the house without breaking the bank.  Some items have been splurge-worthy, but others are pretty inexpensive if we utilize what we already have!   I recently located some furniture to the screened porch and I'm loving making the outdoor space feel like an indoor living area.  Here's what one side of our screened porch looks like after moving some existing furniture we already had and buying some inexpensive details: 

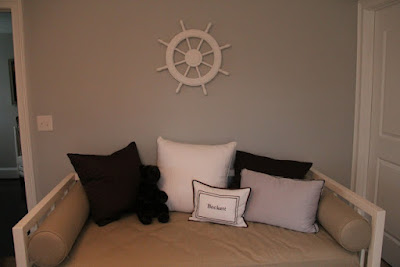
In Beckett's old nursery, we had a daybed that basically never got used
Once he moved across the hall to a different bedroom, the former nursery was used as just a sitting room (or catch all room).  I loved the daybed, but nobody ever sees it or uses it, so I thought it could use some new life outdoors. 
We moved the daybed down from the sitting room, along with a floor lamp,  swapped out a coffee table to the bonus room and grabbed this rattan chair from the bonus room for a new seating area. 
This rattan chair works so much better on the porch than it does downstairs.  
It was a steal when our local Nadeau Imports relocated and moved to Greenville
and I took advantage of a gigantic moving sale which meant grabbing this beauty for $35! 


Some greenery and details! 

Everything turned out pretty cute for a change and didn't cost me an arm and a leg.  The throw pillows were on clearance for $10 at tjmaxx.com (I actually have a few more coming for the opposite end of the porch).  

The throw pillows are all indoor outdoor pillows, but I sprayed the remainder of any fabric down with Thompson's Water Seal Fabric seal, which will help extend the life of the fabric.  I also used an expensive waterproof twin cover to prevent the mattress from becoming wet even though the porch is screened and covered.  


The black and white euro pillows, cabana striped fitted sheet, waterproof twin cover, and rug are all from Amazon and pretty inexpensive.  

Next up, I need to find some drapes for this end of the porch and a nice tall plant for the corner to try not to kill! 

Now I'm just waiting for some cooler weather to be able to stand it out here!  

Happy Tuesday!

Wednesday, July 21, 2021

Air Fryer Roasted Cauliflower


I don’t know about y’all, but I’ve cooked more in the last 2 months than I ever have in my life! I’m so ready to sit down at my favorite restaurant and be served food that wasn’t prepared in a home kitchen!

However, I couldn’t have made it without my air fryer and my pressure cooker! This week we’ve been loving roasted cauliflower.

You'll Need: 
1 head of cauliflower cut into florets 
1/4 c. extra virgin olive oil 
1 Teaspoon salt (optional) 

Prep: 

In a gallon size resealable bag, add florets olive oil, Cavendars and salt and shake the sealed bag until all the oil and seasoning is distributed evenly. 

Air Fry at 390 for around 20-25 minutes, stirring occasionally. 

We love this as an app to dip in Ranch or just as a side! So easy and it’s even picky Beckett approved! 

Sunday, January 17, 2021

Air Fryer Chicken Fajitas


Air fryer chicken fajitas are one of the easiest meals we make in the air fryer and I make them almost weekly!  
You can make this a low carb option by using low carb tortillas, or you can just top with your favorite toppings in a bowl or serve over shredded lettuce for a fajita salad.  

Ingredients
* 2-3 Chicken breasts 
* Bell Peppers sliced 
*.Onions sliced 
* Packet of fajita seasoning (McCormick is my favorite) 
* 2 Tablespoons Olive oil. 

Preparation:
Preheat air fryer for 5 minutes at 390 degrees. 

Cut chicken into very small strips or chunks and place in a resealable bag.  Add peppers, onions, fajita seasoning and olive oil.  Seal bag and shake bag until all ingredients are covered evenly with oil and seasoning.  

Place chicken and vegetables in air fryer basket (I use the Ninja Foodie) and set the timer for 13-15 minutes at 390 degrees.  Make sure to stir halfway through to ensure all sides are well cooked.  

Serve with queso cheese, sour cream and your favorite salsa (Willy’s is my favorite)

Tip:  If you’re making more than 3 chicken breasts and are doing a larger amount, I recommend doing multiple batches or the chicken won’t crisp enough. 

I recently made fajitas with shrimp as well, but cooked the shrimp separately in the air fryer for 8 minutes after I shook them in a resealable bag with fajita seasoning and olive oil.  SO good!

Monday, September 21, 2020

Shrimp Ceviche with Low Carb Tortilla Chips

A few weeks ago a friend brought over shrimp ceviche as an app along with the best tasting low carb tortillas that were the perfect pair!! 

I've made it once since, and easy and fresh and best of all low carb!


Ingredients: 
1 tsp. Old Bay Seasoning 
1 pound deveined shrimp 
1/2 chopped jalepeno 
1 avocado 
1/2 chopped red onion 
1 cucumber 
6-8 cherry tomatoes 
1 fresh lime (juiced) 
Fresh basil or cilantro  

Typically ceviche is made with fresh, raw fish and cured in lime or lemon juice and not cooked with heat, but for this recipe, we both pan seared the shrimp. 


Pan sear shrimp in 2-3 tablespoons of olive oil and Old Bay Seasoning, then mix with diced jalepeno, avocado, cucumber, onion, and cilantro and stir in lime juice.   


For the tortilla "chips", she used these Fit & Active Low Carb tortillas from Aldi.  
I'm not normally a fan of low carb tortillas, but these are really good. 

Brush with olive oil and baked until crispy and crack into chip sized pieces.  
I may even try them in the air fryer next time and give an update.  

Sunday, June 28, 2020

Bacon Wrapped Jalapeños


We love bacon wrapped jalepenos!  Lowe’s Foods has them premade in the deli and one of my favorite restaurants (Midwood Barbeque) uses a different cheese but they’re just as good!  We made both! 

Ingredients:

10-12 jalapeños 
1 block of cream cheese 
1-2 c. mild cheddar cheese
2 packs of center cut bacon
Monterrey jack cheese 

Prep

Slice jalapeños in half and place on a foil lined cookie sheet (I used 2 separate sheets for each kind of cheese)

For Cream cheese mix
Mix cream cheese and cheddar together and scoop into jalepeno halves.  Wrap with bacon and place on cookie sheet.  

For Monterrey Jack cheese:
Cut Monterey jack into small pieces and fill jalepeno halves   Repeat wrapping with bacon and place on cookie sheet.  

For Air Fyer:  Spray wire cooking wrack with cooking spray.  390 for 10-15 minutes (check to make sure bacon is crispy)
For Oven:  Bake at 350 for around 20-25 minutes or until bacon is crispy and done.  

Serve with ranch dressing for dipping!

Sunday, April 12, 2020

Southern Deviled Eggs


Spring calls for egg recipes! I'm usually the designated deviled egg bringer at family functions.  I like mine BASIC.  A lot of mustard, a little mayo, salt, pepper and a paprika to finish them off! I also like mine more mustard-y, so adjust the mayo and mustard ratio how you see fit.

Ingredients:
6 Hard Boiled Eggs
1 T. Prepared Yellow Mustard
2 T. Dukes Mayo
Salt
Pepper
Paprika

Prep:
Half eggs lengthwise and place in a small bowl
Mash yolks and add in mayo, mustard, salt and pepper.

Fill egg whites evenly and garnish with paprika.
I use a ziploc bag and cut the very tip off and pipe the mixture into the whites.

Happy Easter!

Thursday, January 2, 2020

Palmini Chicken Alfredo


I get really excited when I find new low carb options.  Especially ones that I can disguise as pasta.  Palmini pasta is made from hearts of palm and the carb count is low (only 3 g. per serving) and when rinsed and cooked, tastes almost like the real thing!
You can substitute it for any pasta dish by just rinsing and heating. 

Here's how I prepare the Chicken Alfredo:

Ingredients:
4 chicken breasts
2 cans Rao's roasted garlic alfredo sauce (2 carbs per serving)
3-4 cans Palmini pasta (rinsed and drained)


I prepare mine in a pressure cooker (Ninja Foodi model), but you could easily cook your chicken and shred it or even add rotisserie chicken. 

In my pressure cooker, I add the chicken and alfredo sauce. 
Set the function to "Pressure" and set the timer for 10 minutes.  Once the pot has depressurized, I shred the chicken and then add the pasta.  I then set the function to pressure again, and cook for another 5 minutes. 
After the pot depressurizes, I let it sit so that the sauce can thicken before serving!  I top with Himalayan salt and some cracked pepper and done!  Super easy and quick!

If you're missing your starches and longing for pasta, this is a must try.  My husband even prefers this to traditional pasta!

Enjoy!

Friday, November 22, 2019

Amazon Gift Guide for Her

Happy Friday!!  I've had a hard time fitting in some time to rally up some gift guides, but hopefully, this won't be the last  Here are some of my favorites to add to your wish list or buy for a loved one or friend!
1.Bamboo Bath Caddy: If you're like me and love the occasional soak in the tub with a glass of wine and stay there until the water turns lukewarm and you're shriveled up like a prune, this is for you!  It expands to fit different size tubs, and even has feet that pop down and can be used as a tray.  

2.Rabbit Vertical Wine Opener:  I'm pretty sure I included this in my gift guide last year, but it's worth repeating.  EASIEST wine opener to use!  

3. Brazilian Bum Bum Cream: Funny name, amazing cream!  This bottle may be small, but a little goes a long way.  Smells SO amazing!   

4. Gold Triangle Studs: I recently started wearing small hoops and studs in my second hole again.  These are small and dainty and perfect for everyday. 

5. Mellanni White Sheets These are on my personal wish list this year.  Only $29 and over 63,000 rave reviews.  Need I say more?

6. Memory Foam Plush Slippers: These look like Uggs, but are so much cozier (and cheaper)!  The memory foam makes these even nicer! 

7. Ninja Foodie Deluxe:  There's no secret I love a pressure cooker.  We've used ours so often, it needed to be replaced, so I opted for this all in one.  It's a pressure cooker, slow cooker and air fryer.  It even dehydrates!  Ninja is known for quality, and this one is much better made than my last and worth every penny! (After the holidays I hope to have some new recipes to share!) 

8. Foldable Bluetooth Keyboard:  Here's another from my own wish list.  I'm ashamed to admit I text with one finger.  I'm NOT ashamed to admit I can type at warp speed on a actual keyboard.  A bluetooth keyboard makes life insanely easier for me to post and email from my phone or ipad. I carried my last one around in my purse so much that some of the keys fell off.  This one is foldable and the case even turns into a stand!  

9. Air pod Skins: Have a hard time finding your airpods in your purse?  These are non skid and make locating them even easier!  They also come in a variety of color combos! 

That's all for now, but I hope to have some more gift guides up either on the blog or instagram stories soon! 

Friday, October 11, 2019

Friday Favorites - Fragrance Front Runners!

I wanted to do a post on favorite fragrances, but do you know how hard it is to describe a scent?  I guess that's why fragrance commercials are always so bizarre!  How do you advertise and sell something that you can't actually see? 
I had some help from google with describing these, don't you worry.    

Here are my top 4 that will always be in rotation!


1. Lancome La Vie Est Belle A french expression meaning "Life is beautiful"  I've been wearing this scent for the last few years.  It came as a sample in an Ulta flyer and I fell in love with the warm and spicy scent.  It's more floral than what I typically choose, but something about this particular scent seems romantic and feminine (Key notes: Iris, vanilla, praline). 

2. Dolce and Gabbana Light Blue  I've been wearing this scent going on 20 years since it was released.  It's a cult favorite for a reason and that's because it's clean and crisp!  (Key notes: citrus, apple bamboo) 

3.  Juliette Has a Gun NOT a Perfume I almost didn't include this one because I hope the manufacturer will revisit the formula, because my only complaint is that it doesn't stick with you for very long, but I AM including it because I LOVE this scent so much and get stopped a good bit and asked what I'm wearing.  To which I reply "You're gonna get a kick out of the name...." 
Woody and earthy, this one has a more masculine vibe to it, which I enjoy, especially during fall and winter.  I've also tried the sample of the Juliette Has a Gun Vanilla Vibes and love it as well. 
(Key notes: Cetalox (I don't know what that means, either)).

4. Bond No. 9 Bleecker Street  This one wins overall best!  My favorite of the whole lot because this one gets more compliments than any other perfume I've ever worn.  The bottle is giant and worth every penny because it's potent, but not strong and stays with you all day.  I love a good unisex scent that adds a touch of masculinity and this one doesn't disappoint!  (Notes of Cassis, thyme, cedarwood, cinnamon and oakmoss). 

If you're in the market for a new signature scent, hope this helped!  
Happy Friday! 

Tuesday, February 26, 2019

Dining Room Redesign

It's no joke that renovating a space can be quite pricey.  That's why I can't ever do any one project all at once, it just isn't in my budget.  I usually go through phases when upgrading spaces or pieces.  I've definitely been in a phase of buying lately, but it didn't come all at once. Things just happened to fall into place and I found exactly what I was looking for.  I wanted to start upgrading the dining room and it started with a table, chairs the same week, but months went by before I found a rug and just last week, the perfect chairs to finish off the majority of the room arrived.   

To break this down (aside from the light fixture that will be relocated eventually), all the upgrades I purchased totaled a little more than $1,500.
Here's a before shot of the room a few years prior. 
Here's a shot facing the same wall now.
The artwork is a piece my mom painted that I relocated from the hallway upstairs.
The frame reminds me of driftwood and is perfect with the new table and chairs.
It works so much better in this room and adds some much needed color with the neutral tones in the room.
The rustic reclaimed wood table was my first purchase.  It reminded me so much of ones like THESE from Restoration Hardware.... at almost 1/4 or more of the cost! 
The black sideboard from the before picture was relocated from the Great Room along with the lamps that occupied it.
I moved the mirror that once occupied the foyer above the sideboard.
The corner cabinet got a fresh coat of paint and hardware to brighten up the space.
For more about the corner cabinet redo, click HERE 
The rug was a perfect fit and color combo, AND on sale right after Christmas from Rugs USA
These tall slipcovered wing back host chairs were perfect and add some height to the room.
Plus, I love that they are slipcovered and can be removed to clean. 
Lastly, I topped it all off with a small brass art lamp to illuminate the marsh art my mom painted!
It tops off everything so well! 
Here's a breakdown with links included: *Salvaged Wood Table:  Southeastern Salvage $ 488.00
*X Back Dining Chairs : Tuesday Morning $200.00
*7'x9' Faded Tribal Rug:  Rugs USA   $137.00
*Rustoleum Charcoal Chalk Paint: Amazon $16.98
*Rustoleum Linen White Chalk Paint: Amazon  $16.98
*Art Lamp: Amazon $27.47
*Hainsworth Slipcovered Dining Chairs x2 : Wayfair $605.88
*Threshold Marble Knobs: Target $17.98                           

Grand Total: $1,510.29

Eventually I want to either relocate the chandelier light fixture, but for now, I'm giving my wallet a rest!

Tuesday, February 19, 2019

China Cabinet Chalk Paint Revamp

Painting this corner cabinet that belonged to my granny has been on my to-do list for a while.  It's dark finish didn't work very well in my dining room.  When it comes to projects like this, I tend to get overwhelmed.  What color?  Where should I paint it?  Should I put a tarp down in the dining room and have a mess or should I transfer it to the garage so I'm not so worried about getting things messed up in the house.
A few weeks ago, I decided on a color.  I thought going with a lighter shade would brighten up this corner and work better with the current decor.  I ultimately decided to paint the interior a dark charcoal color (which I already knew I liked since I painted 2 other pieces this color.  My china is white, so I knew I wanted a darker color on the back wall of the cabinet so that the china would stand out.
I ordered the paint, started taping the glass, but when it came time to actually begin painting, I became completely unmotivated.  It's not the actual painting that's the pain, it's the removal of hardware and taping off the inside and getting the cabinet moved onto a tarp that's irritating.  
Finally Thursday night, I threw in the towel and said, screw this, it's time to reclaim my dining room and get this thing done! 


I'm so pleased by how it turned out and I'm so glad I decided on a dark backdrop! 

Marble and brushed gold pulls from Target 
Here's the before.  I relocated some of my glassware to the bar cabinet, and added some more of the china.  


Much better!  
*Quick note:  I originally bought a smoked glaze to use as a top coat, but decided I didn't want it to look distressed, or antique, so I went with my original matte top coat I used on all my chalk paint projects.  However, once it dried, it made the white look dingy and antique, so I went back over with another coat of the linen white. 

All items used: 

I'm so excited to have this project done and marked off my list....however there are PLENTY more! 
Happy Tuesday! 

Friday, February 15, 2019

Pressure Cooker Mississippi Pot Roast

I know quite a few people that have either bought or received pressure cookers recently.  As intimidating and scary as they may seem, once you get through the initial pressure test and make your first meal, you'll be hooked!  
I've had mine now going on 2 years and we've loved it, but once this one konks out, I may get an Instant Pot instead.  I would rather have a stainless steel inner pot, and the Power brand doesn't offer that as an option.  
This is the one I use, but the Instant Pot is fairly similar, so the cook times are most likely similar and they have some of the same features.

We have loved ours and I cook more often and it's so quick and easy!   


Mississippi Pot Roast 
I'm not kidding when I say we probably make this once a week.  I'm kind of burnt out on it, but Chad makes it for himself now it's so easy.

Ingredients:
- 3 to 4 pound roast
- Pack of Ranch seasoning mix
- Pack of Au Jus seasoning mix
- 1/2 stick of butter (optional)
- 1/2 jar of peperoncinis (with the juice)

*Cut roast into cubes and add to your pot. 
Press the chicken/meat button and brown the meat until all sides are cooked.  (This takes about 8-10 minutes).

Place your lid on the pot and make sure it's secure (make sure you've followed instructions and have done your test run with water and make sure you know how to secure the lid correctly.

Select the Chicken/Meat button again, then press the 'cook time selector' button in the middle twice to move the time to 1 hour.

Once the pot has pressurized, you'll see the countdown timer start.
Once it's finished, make sure you have read all instructions on how to depressurize and remove the lid.

Shred and serve.

I love this recipe because you literally throw the items in the pot and turn it on.  There's really no effort involved.  For larger roasts, I sometimes have to add an additional 20 minutes for it to be tender enough to shred.  If yours isn't falling apart and you can't cut it with a fork, put the lid back on and add an additional 20 minutes.

I love the pressure cooker because it's a great substitute for a crock pot, but the food cooks in 1/4 time.  A roast like this could take 6-8 hours to cook in a crock pot, but in a little over an hour, you're done.

Here's a lineup of what we cook on a consistent basis and that I'll post more about soon:

-Chicken and noodles
-Chili
-Vegetable beef soup
-Chicken tacos
-Cabbage and sausage
-Basic chicken to use on salads
-Taco soup
-Lasagna soup
-Ziti with meatballs
-Chicken bog
-Boiled peanuts
-Corn on the cob

Monday, December 17, 2018

Hula Hoop Wreath

I saw this idea on Instagram a few weeks ago and saved the post to come back to if I had time to do this before Christmas and lo and behold, we finally were at home most of the weekend and I could do a little DIY.  I loved how simple and elegant the ring wreath looked and who would have thought it's actually a hula hoop?  Saturday afternoon, Beckett and I were cleaning out old toys when I came across his old hula hoop and thought if MAYBE I could scrounge up enough remnants throughout the house, I could make one.  
I never realized that underneath the hoola hoops that are covered in holographic stickers is just a plastic black base.  It took a good bit of peeling, but finally I was left with a black hoop to use for the base.  I had Chad poke a hole on the backside to drain the water out of the hoop so that it wouldn't put strain on bottom end once it was hung.  

After rummaging through the attic, I came across a box of cheap wired garland I used outside a few years ago. I think I originally got it from Target  and it's $2.80 for 9'.  I tightly wound the garland around the hoop on one end, fluffing out the sprigs to look as full as possible.  Now I'm left with a base that I can easily slip other garland remnants into.
I remembered my front door wreath had green berries, so I snipped a few long strands off of it on the backside of the wreath without leaving a gap.

My tree in the bonus room is a faux tree that has tiny pinecones, so from the backside of the tree, I snipped a few branches off in an inconspicuous place.

It still needed something else, so I snipped a few faux magnolia leaves from the garland on my dining table. 

It needed a simple swag of ribbon.  I large wired bow would ruin the simplicity of it.  I was lucky enough to have found 2 pieces of leftover ribbon, I ironed out with my flat iron, and tucked it right in the middle to finish it off!

This whole project took 20 minutes tops.  I hung it with a command hook in my window and tada! 

No hot glue, not wiring!  And best of all, I didn't purchase one single item to do this!

Happy Monday!

Wednesday, December 12, 2018

Chalk Paint Revamp

Over the summer, I decided to revamp a few dark wood pieces in our home.  I painted a dresser, a chest of drawers, and this hallway table in about 2 weeks time.  Painting has never been my favorite thing, but I was surprised at how easy and quick I turned these around.
I should have gotten better pictures of how dark it looked in this hallway downstairs right before I painted it. I stole this shot from the house tour tab that I desperately need to update.  

Here's where my project began.  (The dresser in the background also got a revamp, but I'm still working on styling the bonus room and making some changes and mounting the tv, so more to come on that).  I didn't take pictures of step by step progress, but there are plenty of tutorials on Pinterest and a quick google search will help you if you're new to the chalk paint process.

I started off by removing the handle hardware and giving it a good sanding and wiping off all the dust from sanding before I started my first coat.
The color that I used was "Garden Trowel" by Magnolia Home from Target   I used a chalk paint brush from Amazon to apply the paint.  If you've never used chalk paint before, the first thing you'll notice is that it dries super fast.  I applied long, consistent brush strokes to obtain a more matte, clean finish.  (There are plenty of blogs and info online about this, so you may want to let the experts explain better than I can).  I let that coat dry overnight and repeated the process the next day with a second coat.  
*Note: With all three of these projects I had a few spots where the paint looked like it hadn't dried and was darker.  I just resanded the area and touched up the paint and you couldn't tell.  
After the second coat dried overnight, I applied a thin layer of Rustoleum Matte Clear Topcoat.  This evens out the color and protects the finish, and I read a few different reviews that stated this was easier to apply than the traditional wax finish for chalk paint.  


I finished it off with the same modern brushed gold pulls I used for the downstairs dresser (especially since I had 4 leftover from the dresser project and it meant not having to look for new pulls since these fit.

I like this table so much better upstairs and the lighter shade is a better contrast with the dark hardwoods.

My next project is painting my granny's corner cabinet in my dining room, but I'm having a hard time deciding on a color.  Once the holidays are over, my plan is to work on whipping the dining room into shape since I'm happier with it now that the furniture has been rearranged! 

Happy Wednesday!